Tools required
- Measuring tape
- Pencil
- Mastic gun
- Straight edge
- Jig saw (shears or hand saw can also be used)
Protective masking on the front of the sheet should be carefully pulled downwards and removed when the job is complete.
- 1
Check all walls to be clad, make sure they are dry and free from oil and grease.
- 2
New walls and plasterwork should be cleaned down with a sweeping brush, and a coat of PVA applied (mix one part PVA to four parts water). This can be applied with a roller or paint brush.
- 3
If the back of the sheet needs to be cleaned, use only recommended DL chemicals cleaning products. Never clean the sheet with harsh liquids or chemicals.
- 4
The bottom (heavy) J-trim can be bonded and sealed to the wall. The position for the J-trim is usually 100mm from the bottom of the trim to the finished floor level.
- 5
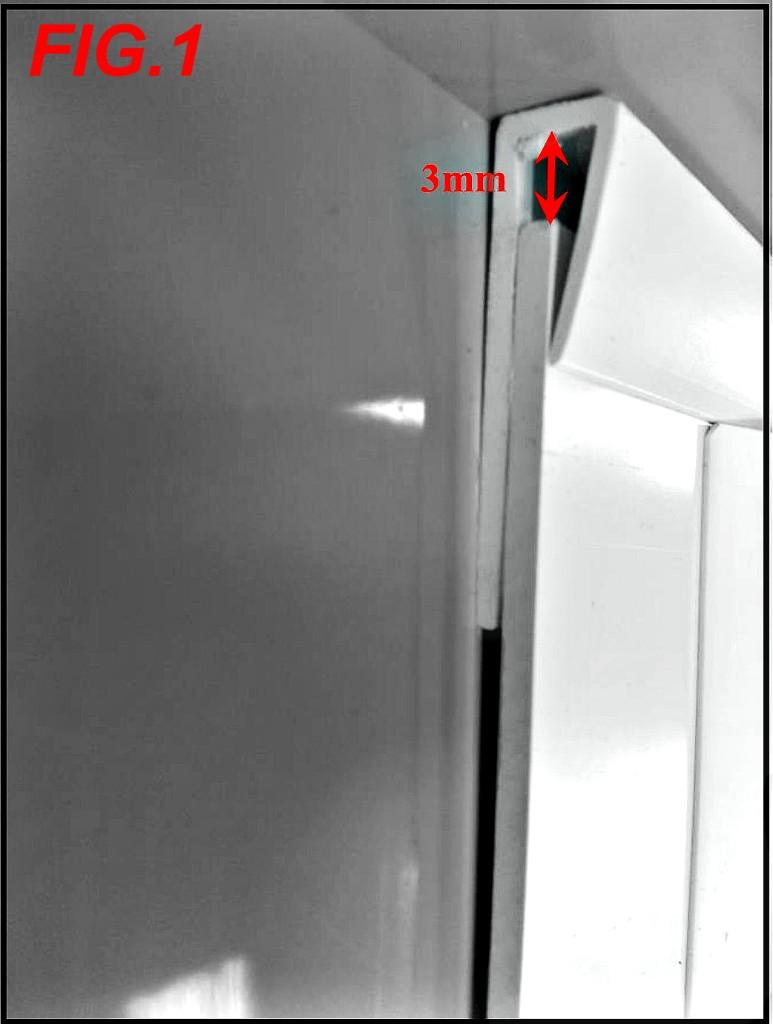
To cut the sheets to the correct height, measure vertically from the bottom of the trim to the ceiling and deduct 3mm for expansion of the PVC sheet (Fig 1).
- 6
Peel back some of the masking at the top of the sheet and cut the top (light) J-trim to size (1230mm will allow for 5mm extra each side of the sheet), then clip it on to the top of the sheet.
- 7
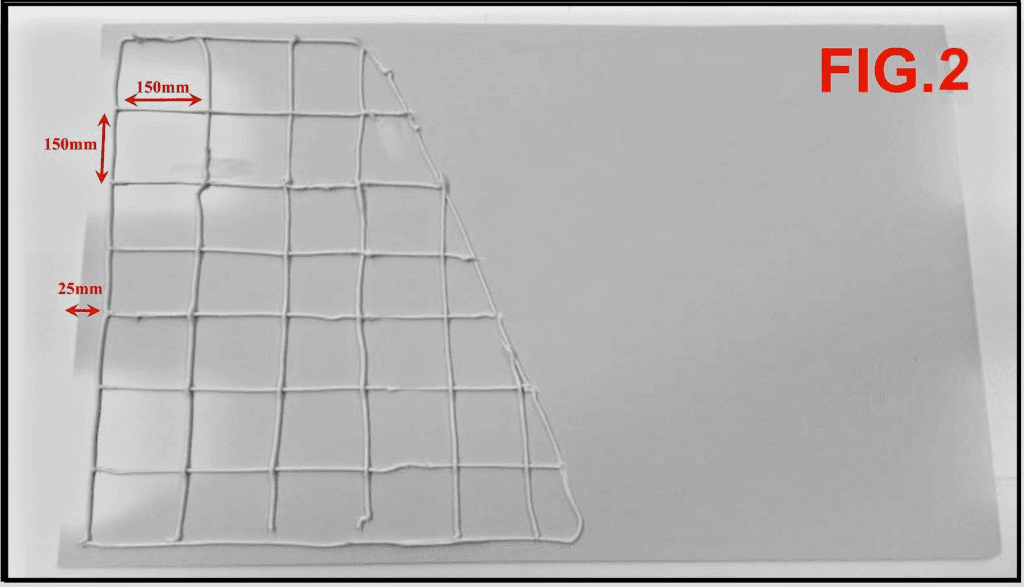
Cut the nozzle of the construction adhesive to achieve a 6mm bead of adhesive when applied to the sheet. Apply to the back of the sheet in a grid squared pattern of approx. 300mm squares (Fig 2).
- 8
Lift the sheet into the bottom J-trim, and smooth out with your hands until the sheet has fully gripped the wall.
- 9
At the edge of the sheet, carefully peel back some of the masking tape. Cut the backing trim of the 2-part joiner bar to correct height by measuring from the ceiling to the bottom of the heavy J-trim. Deduct 60mm from the measurement and cut to size.
- 10
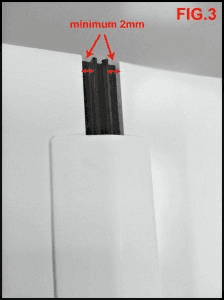
Fit the second sheet and bond to the wall. Make sure there is a gap of minimum 2mm each side of the backing trim to allow for expansion of the PVC sheet (Fig 3).
- 11
Fit the front cover after each sheet by tapping into position with a mallet. For a watertight seal, silicone can be applied before the cap is fitted.
- 12
Vertical and horizontal machines supplied to their own installers for folding the PVC onsite. Alternatively internal and external PVC profiles can be used and bonded in place.
- 13
Before the masking is pulled off, using a cloth or roller, brush out the fitted sheets to expel any air that may have been trapped then use silicone to seal around trims etc.
- 14
The sheet should not reach a maximum temperature of 55 degrees at any time.
The steps above are guidelines based on past tests and installations. Adjust for exceptional circumstances where the substrate is contaminated, moisture levels are high, or temperatures are extreme.
Printable installation guide
Full hygienic cladding fitting brochure with diagrams and trim details.